I've been using my Bullet Journal for almost 2 months now. Since everyone is going to use one of these a little differently, I thought I'd share what's working for me.
No Monthly Calendar
Yes, the little video says to create a list version of a calendar. But I just cannot do it. I like that my digital calendars stack events, show overlap, are automatically color coded, and send reminders.. And that they talk to each other. (I have a no longer supported program that syncs Google calendar with Microsoft Outlook.) That part of my system was already working, so I'm not changing it. However...
Yearly Calendar
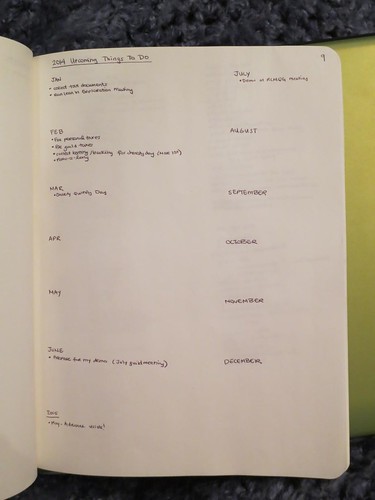
...I do love my yearly calendar page. (Shown up top, at the beginning of the year, it has many more things on it now.) This is where I write events that are a few months out. Yes, I can check my digital calendar, but that doesn't help me for events that don't have a set date yet. So this is where I log upcoming but still nebulous events. I also log recurring things that I need to remember to do (like taxes or termite inspections(, and any big events (even if they have a date). This helps me know how much is going on in any given month so that I don't accidentally over schedule.
My yearly calendar has a heading for each month and under it I bullet the upcoming events. Under that I have a single list for 2015. There are far fewer of those events, so they need less space.
Comprehensive To Do Lists
I dedicate one page to home and one to work. My home list has subheadings like "Being a Responsible Adult" or "Things to Make" or whatever else makes sense for that grouping. I usually have one for each club/group I'm associated with, one for fun stuff, etc. At work, I organize by projects and usually have a category for general administrative stuff too.
I don't worry about adding tiny things to this list. You know stuff that comes up and you do immediately and it's done? I don't bother. But anything I need to track or do not *rightthisinstant* goes on the list. This is the place that all those "oh! I need to do X" thoughts go. This is where my action items from meetings go. This where the "you know I'd like to do x" items go.
Then I have a daily to do list. This is grouped by day and is created by referencing the home/work lists and picking which items need to be done /I would like to do that day. I add smaller items that come up through the day as well. So "pick up library books on the way home"? If I think of it at work and will do it that evening? Daily List. If I think of it over the weekend and know I will need to do it later that week? Home List.
I check things off as I do them. Once the page is full and/or I am having a hard time seeing what is unchecked because of all the checked off stuff...I start a new page. I have some post it flags that I used to mark work, home, and daily lists. When I start a new page, I move the flag to the new spot.
Meeting Notes
This has been brilliant. I am a note taker to the core, but I've never had a good spot for non-work related notes. If I took them on paper, I never knew what to do with them after. So I generally took them on my phone. But I'm a slow thumb typist and then everyone thinks you are being rude and antisocial. So! This is much better. I can easily reference them later. Because many of my meetings are monthly, if I don't use the whole page, I just take next month's notes in the same spot.
Brainstorming
This is another thing that I used to do on scrap paper and then never know what to do with. Now, not only do I not lose it, but the index means it will be easy to find even months/years from now.
Lists
I keep a running list of restaurants I want to try (much better than my previous draft email method), but I could also use the method for books, websites, etc. In fact, I'm thinking of starting a general "recommendation" list for random recommendations from friends. The categories are all over the place, so unless they are restaurants, I think they will all go here.
Have you tried a bullet journal? Or a similar method? Does it work for you?